NetSuite (Oracle NetSuite)
DLH.io documentation for NetSuite (Oracle NetSuite)
NetSuite is the first online financials and ERP platform with tens of thousands of customers that enables an efficient and robust feature-set to run the core of the business. With all of the financial and operational data, transactions, customer, product, and inventory information it is imperative that NetSuite customer have flexible access to all of the current and historical data available to key data workers in their organization that can help you make better decisions to increase revenue, save costs, etc. and you're going to need a way to synchronize that data to a warehouse in order to democratize access to enrich the NetSuite data with other operational or marketing information. And that's where our NetSuite connector comes in.
Setup Instructions
Follow the setup steps guide for configuring your NetSuite (Oracle NetSuite) connection to enable data to flow into your destination via DLH.
Supported Features
Here are key features supported for this connector.
| Sync Feature | Supported | Details |
|---|---|---|
| Custom Data and Development | ✓ | Ability to enhance connector upon request |
| Historical Re-Load/Load | ✓ | |
| Incremental/Delta Load | ✓ | Gets most recent records and changes |
| Column Selection | ✓ | |
| Column Hashing | ✓ | |
| Re-Sync Table/Entity | ✓ | Select at the table level to reload data history (on next Sync Bridge run) |
| Custom Queries | Utilizing SQL Data Query Connector | |
| Custom Data | ||
| Captures Deleted Rows | ✓ | On all supported tables |
| API Sync Bridge Initiation | ✓ | |
| Priority Scheduling | ✓ | |
| Private VPC/Link | ☂ | |
| DLH Data Model Available | - |
If you have any questions about these supported features please reach out to our Customer Support team.
Details on Sync Processing
For this connector, we believe the sync processing is straightforward. We've provided a number of details, steps, and other guidance here and in the setup steps guide. Be sure to also check the change log and notes page from time to time for any changes.
Configure Your NetSuite Account for SuiteCloud and OAuth 2.0
-
Begin configuring Setup from the main header menu and click on the path Setup > Company > Enable Features in order to access the SuiteAnalytics enablement area.
-
Click on the SuiteCloud tab

- Check the box for Client SuiteScript in the SuiteScript section
- Click on I Agree to accept the terms of service that opens
- Check the Server SuiteScript option in the SuiteScript section
- Click on I Agree to accept the terms of service that opens
- Under the SuiteTalk (Web Services) section check the checkboxes for:
- SOAP WEB SERVICES
- REST WEB SERVICES
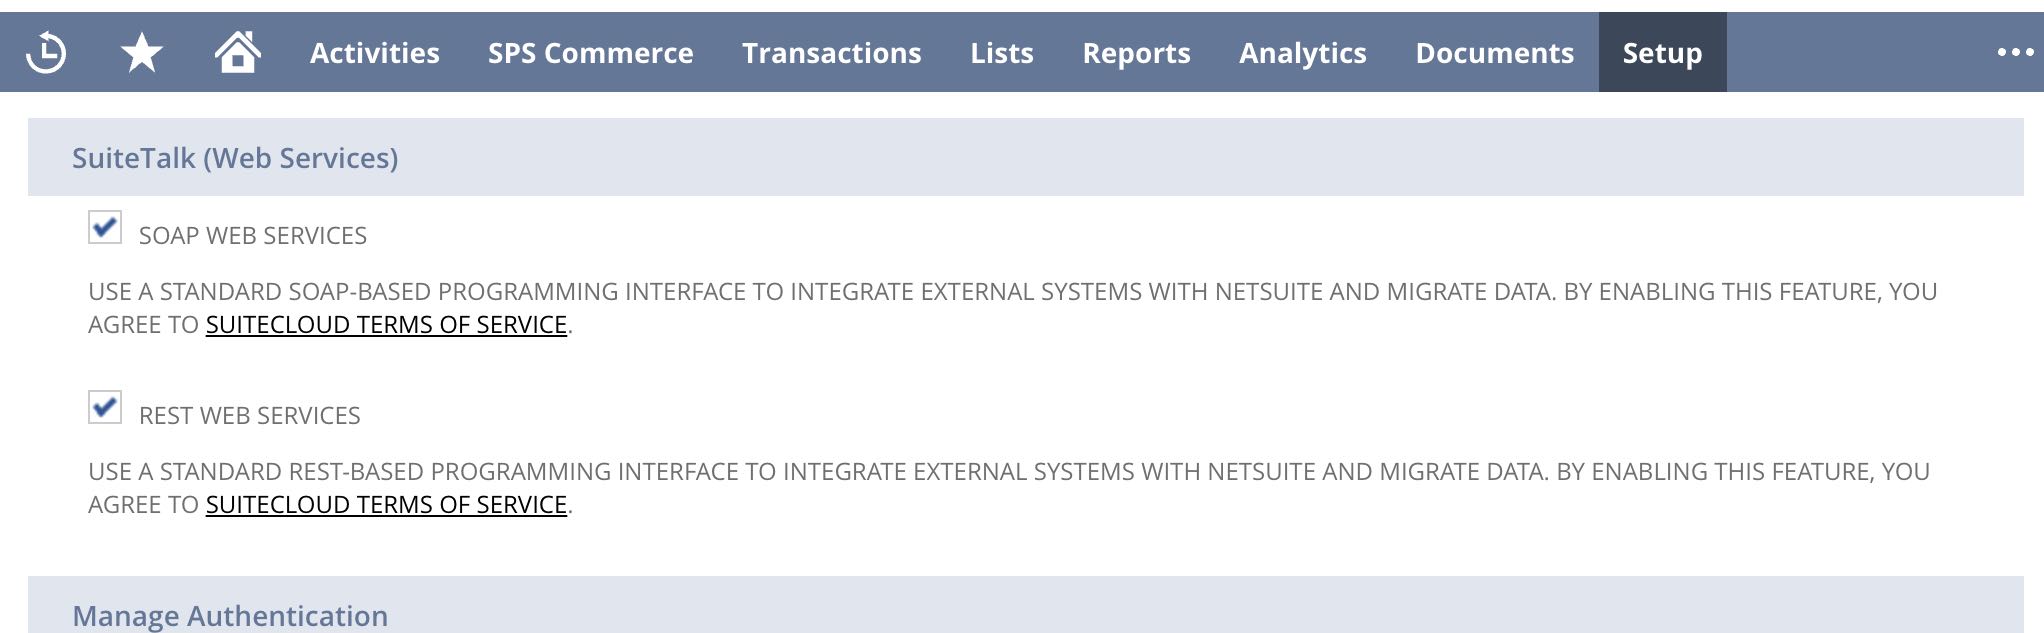
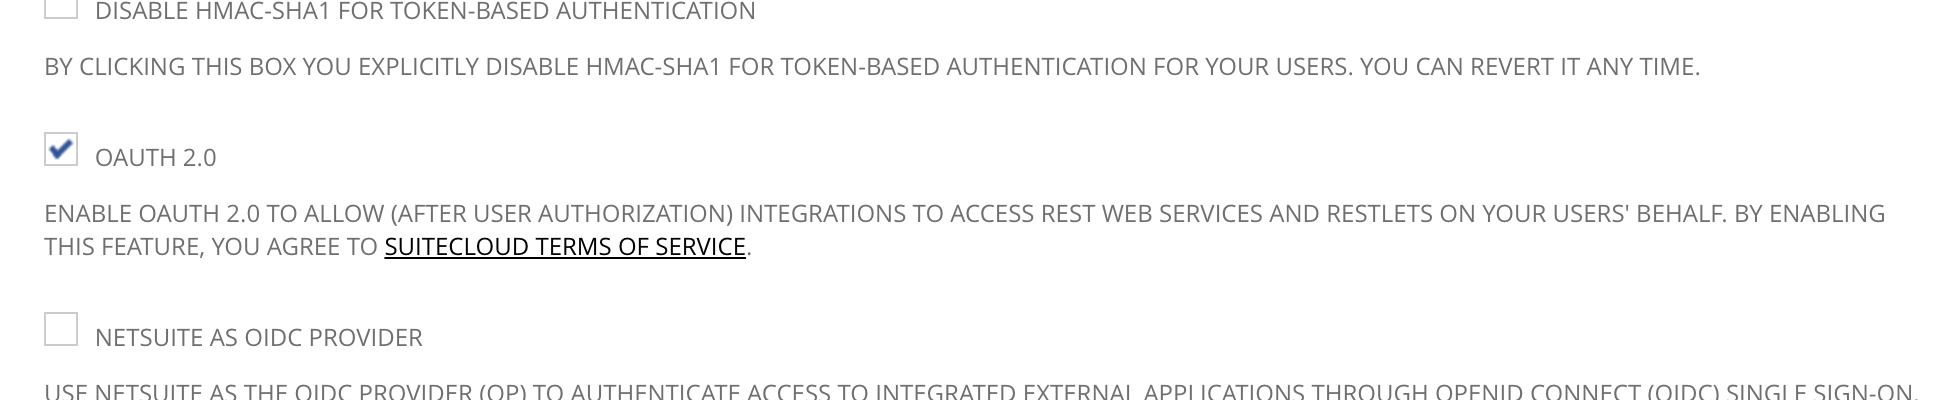
Under Manage Authenctication, check the checkbox for OAUTH 2.0
Save the Setup Enable Features page by clicking the Save button at the bottom or the top of the Enable Features page

-
(Optional) If using the DLH.io standard NetSuite (Oracle NetSuite) connector you will also check the checkbox for OAUTH 2.0, which allows different entities to be retrieved (Optional for this connector)
-
Click the Save button which is visibile when you scroll to the bottom of the page.
Create an Integration for NetSuite REST API OAuth 2.0 Access
- Navigate to create a new integration by accessing the main header and selecting Setup > Integration > Manage Integrations > New
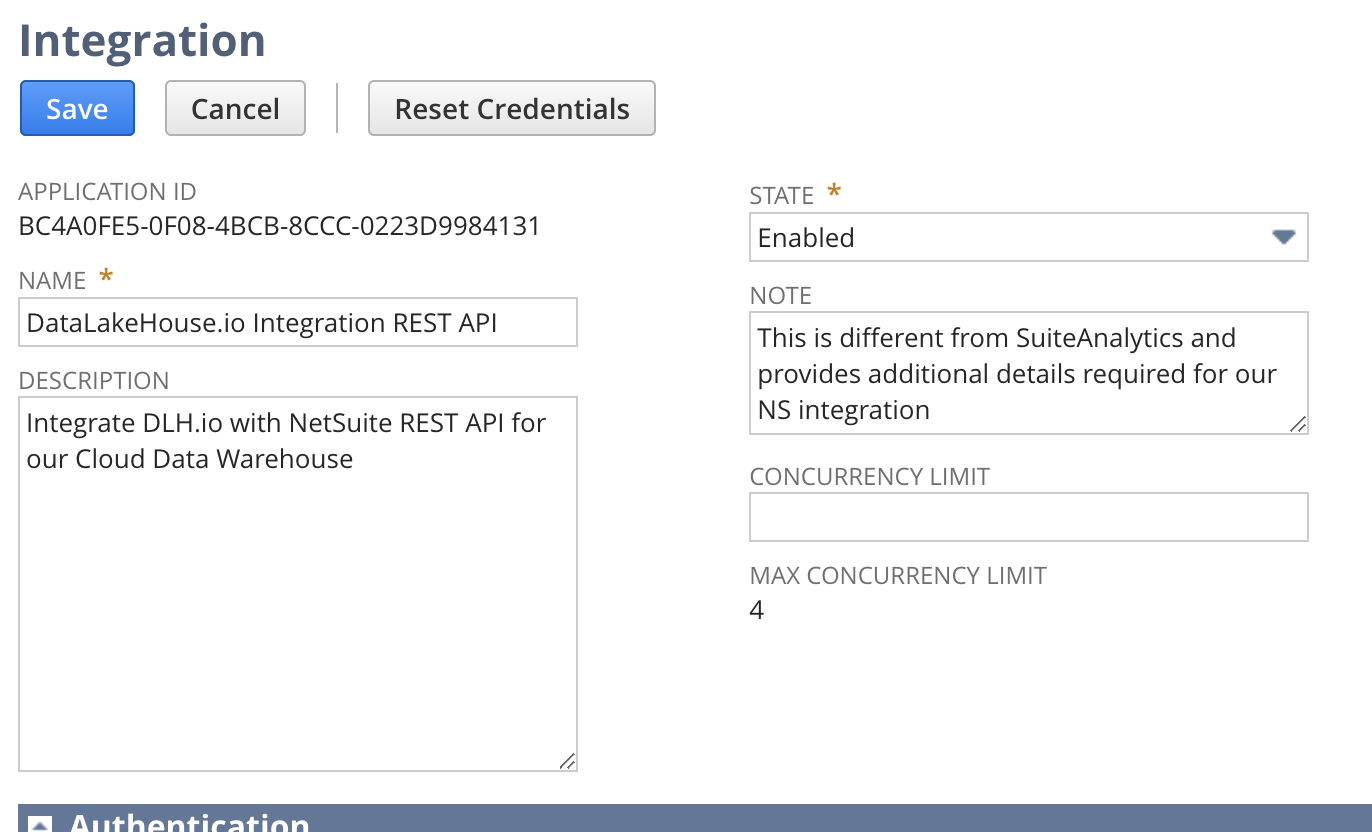
- In the create new integration page you will need to update the following items by updating the following form fields with the values:
- Name = DLH.io Integration REST API
- Description = Integrate DLH.io with NetSuite REST API
- State = Enabled
- Note = Optional, for your records
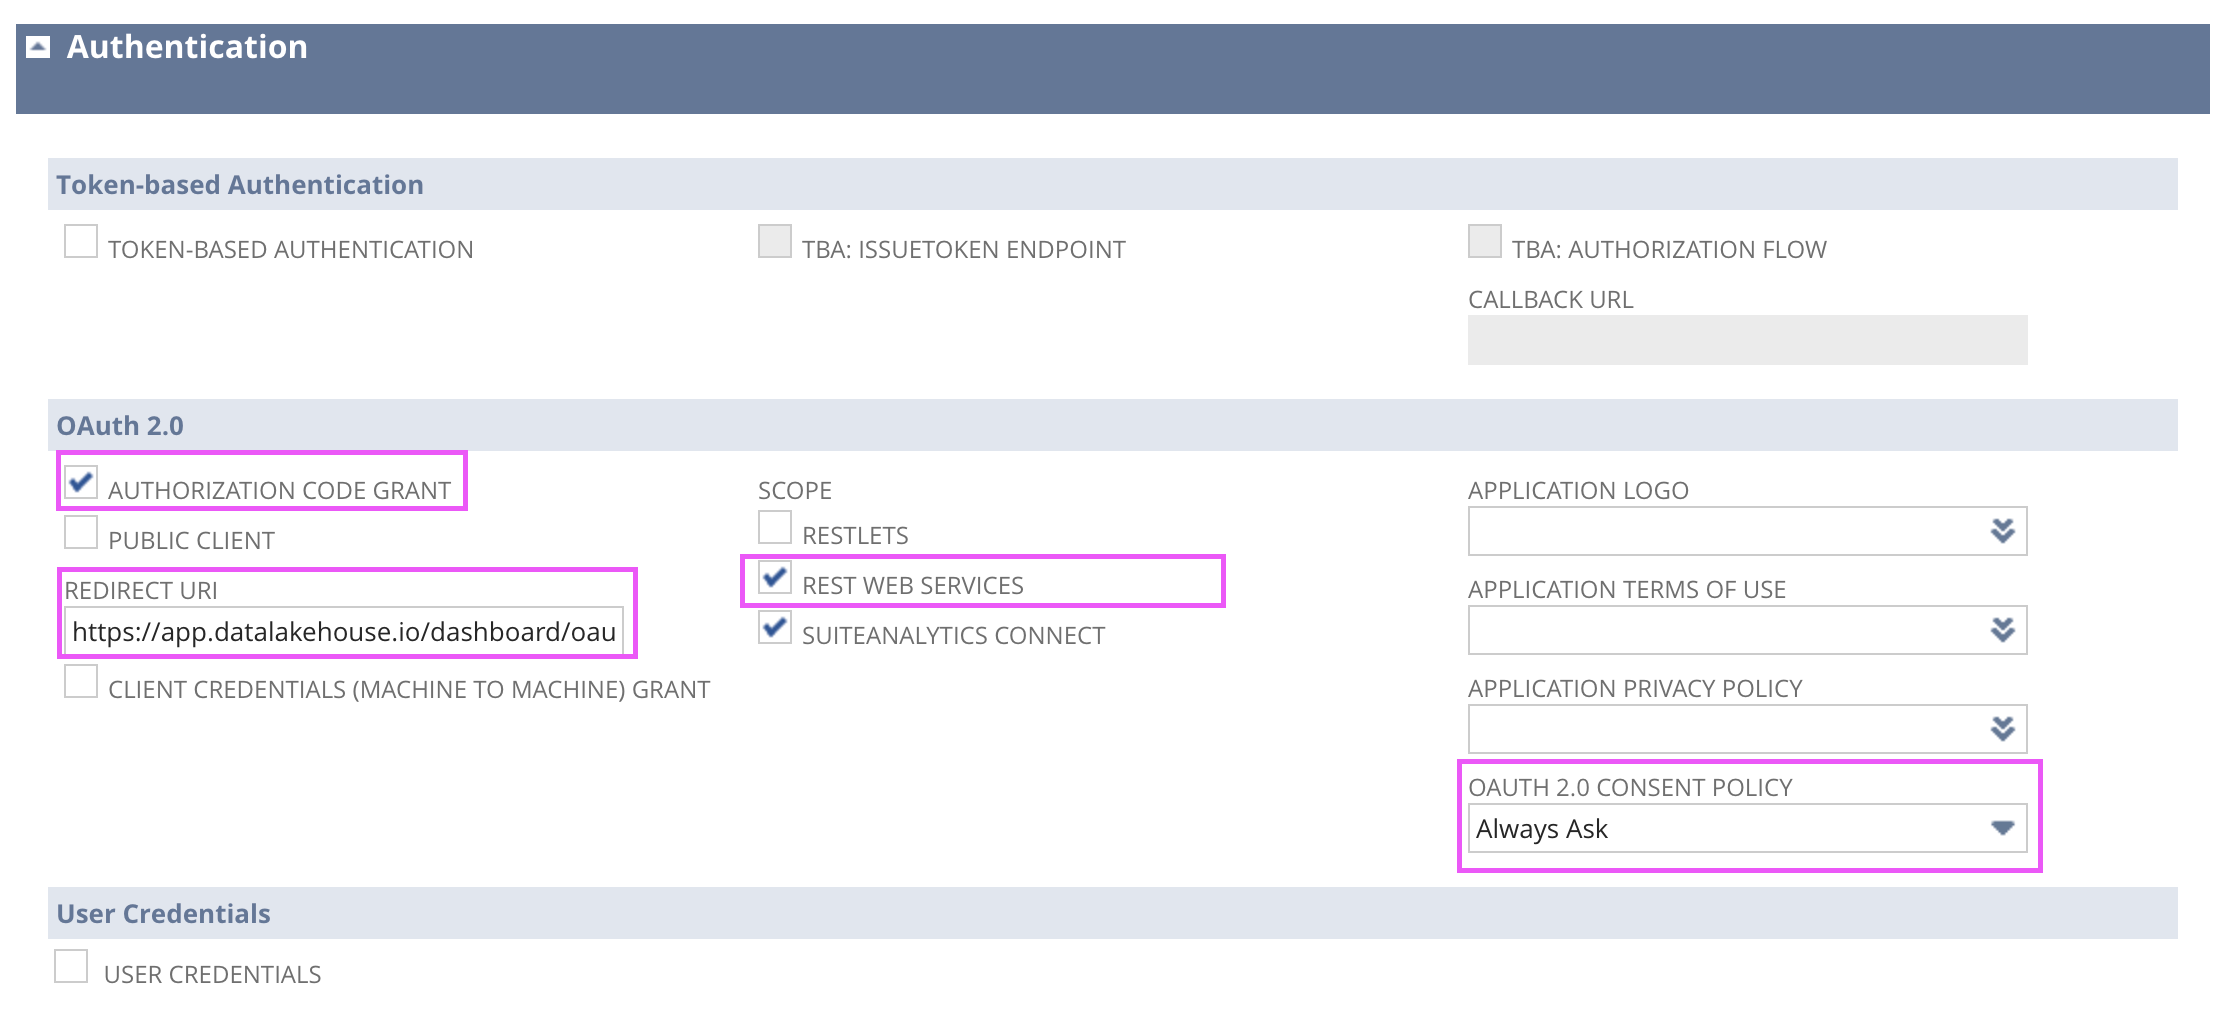
- Authentication area:
- OAuth 2.0 section:
- Authorization Code Grant = Check the checkbox
- REST Web Services = Check the checkbox
- SuiteAnalytics Connect = Check the checkbox
- Redirect URI = https://app.datalakehouse.io/dashboard/oauth-redirect
- You must enter the appropriate value for redirect which is an endpoint on DLH.io so that the integration configuration will complete and use the appropriate setup once you create the source connector in DLH.io.
- OAUTH 2.0 Consent Policy = Always Ask
- OAuth 2.0 section:
- Click the Save button to save the integration (and then scroll immediately to the bottom of the page)
The Client Credentials area will appear above the Save button area and underneath the User Credentials section towards the bottom of the page.
Please copy these as they will be used in your connection settings for DLH.io.
NOTE: These keys, and secrets will not be visible once you leave this page. So, please copy them somewhere to be safely stored and used when creating the connector. If you somehow miss this opportunity, revisit the integration you just created and click the 'Reset Credentials' button at the top of the page.
User Role & Permissions Required for Integration Access
A new role is highly recommended to be created in order to assign the necessary permissions for OAuth2 Integration.
When the DLH.io connection is first created and authenticated you are redirected back to your NetSuite account and have the ability to select the role which you will access the NetSuite REST API through, and that role needs to have the appropriate access.
However, you could use an existing role. We recommend creating a new role which will be specific to the DLH.io and NetSuite integration.
-
Navigate to Setup > Users/Roles > Manage Roles > New
-
In the name field, enter a unique name for the role, ex: DLH_NS_ROLE
-
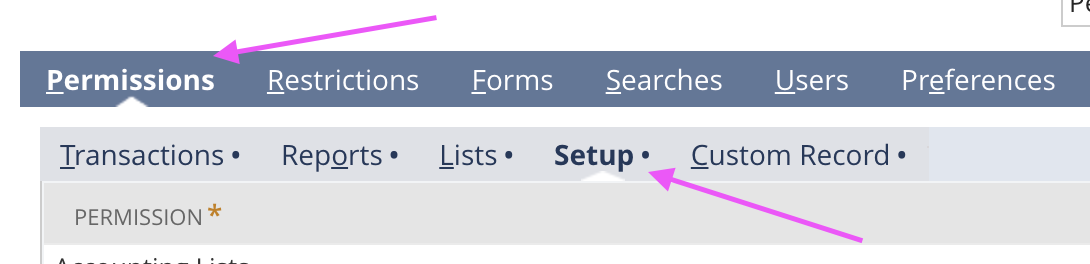
Scroll down the page to find the Permissions tab
-
Click the Setup sub-tab
-
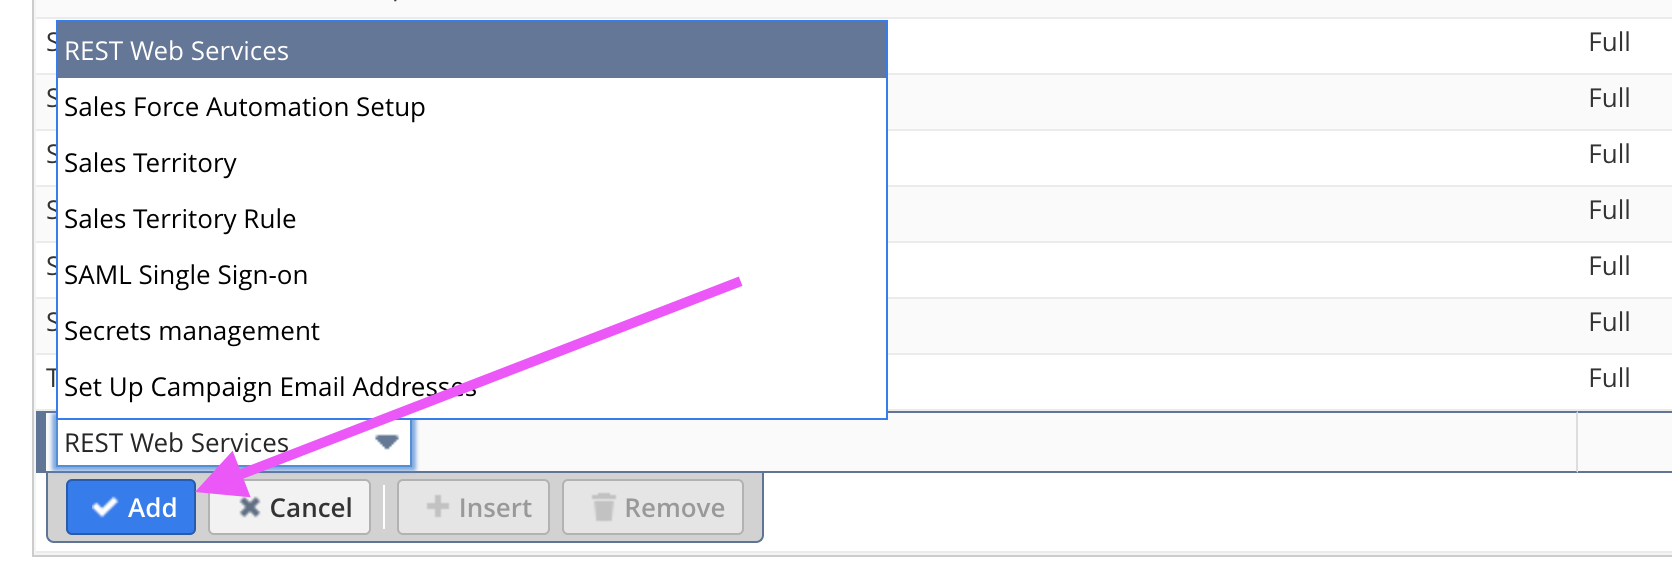
From the permissions dropdown select the following and click the Add button to add these permissions:
- REST Web Services
- SOAP Web Services
- Log in using OAuth 2.0 Access Tokens
-
Click the Save button to save the new role you created
-
Next, we need to specify which user will connect to SuiteAnalytics when configured in DLH.io, so navigate to Setup > Users/Roles > Manage Users
-
Click the name of the user which you've identified to be the user profile that will connect to NetSuite SuiteAnalytics
-
In the resulting page click the Edit button
-
Scroll down to the bottom and click on the Access sub-tab
-
Click the Roles sub-tab
-
From the dropdown select the Data Warehouse Integrator role
-
Click Add
-
Click the Save button to save the changes for the user
Optional/Alternative, Updating an Existing Role with Permissions
NOTE: If updating any existing role to add these permissions necessary for the OAuth 2.0 access, find the role, click to edit the role, then in the sub tab click on Permissions > Setup then below you will be able to add the new permission as follows:
Schema Details (ER Diagram)
This entity relationship diagram (ERD) provides you with information about what entities/tables DLH provides for you out-of-the-box and how they are related to one another.
Issue Handling
If any issues occur with the authorization simply return to the sources page in DLH.io, edit the source details and click the Save & Test or Authorize Your Account or Re-Authorize Account button to confirm connectivity. If any issues persist please contact our support team via the DLH.io Support Portal.
Other Notes
If your credentials used to access the entities do not have proper permissions or your setup of NetSuite restricts querying of certain entities, then these entities will not show in the Source Schema tab and will not be part of the sync process.